
Five moves account for most of the savings any AWS account can capture from S3: set lifecycle expiration on temporary data, abort incomplete multipart uploads after a baseline number of days recommended by AWS, expire or archive noncurrent object versions, switch unpredictable-access data to Intelligent‑Tiering, and run S3 Storage Lens alongside Cost Explorer to find the buckets actually driving the bill. None of these require a re-architecture. Most take under an hour to configure and start producing measurable savings within the next billing cycle.
Here’s the order that gets you results fastest, ranked by effort versus payoff:
- Abort incomplete multipart uploads older than 7 days. This is pure waste. Failed or abandoned uploads sit in your bucket accumulating storage charges with zero business value, and AWS calls this out directly in its own cost-reduction guidance.
- Set expiration on noncurrent versions. If versioning is on and nobody’s cleaning up old versions, you’re paying to store every draft of every object forever.
- Apply lifecycle expiration to temporary and log data. Application logs, build artifacts, and cache files rarely need to live past 30 to 90 days.
- Turn on Intelligent‑Tiering for buckets with unpredictable access. It removes the guesswork of picking a storage class and, per AWS’s own positioning, avoids retrieval fees within the class.
- Run Storage Lens plus Cost Explorer to find your worst offenders. You can’t fix what you haven’t measured, and cold, oversized, or misconfigured buckets are usually hiding in plain sight.
Pro Tip: Test every new lifecycle rule against a single prefix or a copy of the bucket first. A misconfigured expiration rule can delete data your compliance team needed retained, and that mistake costs far more than the storage bill ever would.
Key Takeaways
S3 cost optimization works best as a repeatable cycle of audit, pilot, and automation, anchored by Storage Lens diagnostics and disciplined lifecycle governance rather than a one-time cleanup.
| Point | Details |
|---|---|
| Fix multipart waste first | Abort incomplete multipart uploads after 7 days; it’s the lowest-risk, fastest-paying action available. |
| Clean up versioning | Expire or archive noncurrent versions once they exceed roughly 10% of bucket storage. |
| Analyze before transitioning | Run Storage Class Analysis or Storage Lens for 30 to 90 days before automating any Glacier transition. |
| Default to Intelligent‑Tiering for unpredictable data | It removes prediction risk but carries a monitoring fee, so skip it for buckets full of tiny files. |
| Govern continuously, not quarterly | Everythingcloud’s managed FinOps platform layers automated remediation and multi-account enforcement on top of Storage Lens signals to stop drift from rebuilding costs. |
Table of Contents
- What You Actually Pay for in S3 (the Bill Line Items to Watch)
- The 10-Minute Storage Lens and Cost Explorer Diagnostic
- Which Actions Actually Move Your S3 Bill
- S3 Intelligent‑Tiering: When It’s the Right Default
- Copy-Ready Lifecycle Rules and CLI Commands
- Why Automated Transitions Sometimes Increase Your Bill
- Rolling It Out: Audit, Pilot, Automate
- Where Continuous Optimization Beats a One-Time Cleanup
- How Everythingcloud Keeps S3 Costs From Creeping Back
- Sources
What You Actually Pay for in S3 (the Bill Line Items to Watch)
Your S3 invoice isn’t one number. It’s five or six separate meters running simultaneously, and s3 cost optimization means knowing which lever moves which meter.
Storage is billed by GB-month, which AWS calculates internally using byte-hours, then converts to a monthly average. If you store 100 GB for 15 days and then delete it, you’re billed for roughly 50 GB-months, not 100. That distinction matters when you’re trying to model savings from a lifecycle change that only affects part of a month.
Requests cost money too, and they’re easy to overlook. GET, PUT, and LIST calls are billed per thousand requests, and high-frequency access patterns (a Lambda function polling a bucket, an analytics job listing thousands of small objects) can quietly become a bigger line item than the storage itself.
Data transfer out to the internet is billed separately, and it scales fast for public-facing content. Storage-class transitions carry their own per-object request fee, and moving into Glacier tiers adds metadata overhead. Every Glacier or Glacier Deep Archive object carries roughly 32 KB to 40 KB of additional metadata billed at the Glacier rate, per AWS’s cost optimization documentation. For a single large file, that’s irrelevant. For millions of small files, it can erase the savings you thought you were getting.
Object size and count interact with almost every cost dimension at once:
- Small objects below a certain size may be billed as if they were larger when transitioned into certain storage classes, which can negate expected savings.
- High object counts inflate request costs regardless of total data volume.
- Consolidating many small files into fewer, larger ones reduces both request overhead and per-object Glacier metadata costs.
| Dimension | What it affects | Why it matters for optimization |
|---|---|---|
| Storage cost vs. retrieval fees | Monthly bill vs. per-request charges | Cheaper storage classes often carry retrieval costs that can exceed the savings |
| Access latency | Milliseconds (Standard, IA) vs. minutes to hours (Glacier variants) | Determines which workloads can tolerate archival tiers |
| Minimum storage duration | Early-delete penalties | Moving short-lived data into Glacier can trigger fees if deleted early |
| Per-object overhead | Glacier metadata bytes | Penalizes high object-count, small-file workloads disproportionately |
| Monitoring or automation fees | Intelligent‑Tiering monitoring charge | Adds a small per-object cost that scales with object count, not size |
Every meter above responds to a different fix. That’s why a generic “move everything to Glacier” strategy so often underperforms a targeted, access-pattern-aware approach.
The 10-Minute Storage Lens and Cost Explorer Diagnostic
You don’t need a consultant or a multi-week audit to find your biggest S3 savings opportunities. You need ten minutes, Storage Lens turned on, and a short checklist.
- Enable S3 Storage Lens at the account or organization level if it isn’t already running. It’s included at no extra cost in its default configuration, and it surfaces the exact cost-optimization metrics you need.
- Open the Cost Optimization dashboard inside Storage Lens and sort by total storage size, descending.
- Check incomplete multipart upload bytes older than 7 days. Any nonzero number here is free money left on the table.
- Check the percentage of noncurrent version bytes per bucket. Buckets where this exceeds 10% of total storage are strong candidates for version cleanup.
- Check average object size and total request rate. Very small average object size combined with high request volume is a request-cost problem, not a storage problem.
- Check retrieval rate against total storage. A bucket with low retrieval frequency and large total storage is your best archiving candidate.
- Cross-reference with Cost Explorer and cost allocation tags to confirm who owns each bucket before you touch anything.
| Metric | Threshold to flag | Likely action |
|---|---|---|
| Incomplete multipart bytes >7 days | Any nonzero value | Apply abort-incomplete-multipart-upload rule |
| Noncurrent version bytes | Above 10% of bucket total | Expire or transition noncurrent versions |
| Retrieval rate | Below 1%, with large total storage | Candidate for Glacier or Deep Archive transition |
| Average object size | Below 128 KB, high count | Avoid IA/Glacier transition; consider consolidation |
| Buckets without lifecycle rules | Any bucket flagged | Immediate audit priority |
Pro Tip: Before deleting or expiring anything, confirm the bucket owner using cost allocation tags. A cold bucket with zero retrievals in 90 days might just be an orphaned dev environment, or it might be the quarterly compliance archive nobody touches except once a year. Ten minutes of ownership confirmation saves you from an expensive mistake.
Which Actions Actually Move Your S3 Bill
Not every optimization is worth the engineering time it takes to implement. Here’s the ranked list, based on typical impact and how much operational risk each one carries.
- Lifecycle expiration for ephemeral and log data. Low effort, often the single biggest quick win. Logs and temp files rarely need to survive past 30 to 90 days.
- Noncurrent version expiration. Low to medium effort. If versioning is on for compliance reasons, transition noncurrent versions to a cheaper class instead of deleting them outright.
- Aborting incomplete multipart uploads. Near-zero effort, near-zero risk, and AWS explicitly recommends a 7-day baseline.
- Enabling Intelligent‑Tiering. Medium effort to configure at scale, low ongoing effort once set, and it’s the right default for unpredictable access patterns.
- Consolidating small objects. Medium to high effort, but it reduces both request costs and Glacier per-object overhead simultaneously.
- Routing public content through CloudFront. Medium effort, meaningful savings on data transfer out, since CloudFront’s cached delivery is typically cheaper than direct S3 egress at volume.
- Using VPC gateway endpoints for S3 access. Low effort, avoids NAT gateway data-processing charges for in-VPC workloads talking to S3.
- Reviewing cross-region replication costs. High-value review, because replication multiplies storage cost and adds transfer charges that are easy to forget once configured.
Practitioner audits reviewing real accounts have found that combining lifecycle policy fixes with multipart cleanup and version management can produce savings in the range of 20% to 70% depending on how neglected the account was beforehand. AWS’s own guidance points to a similar pattern: Storage Lens-driven remediation across their customer examples typically nets savings of 20% or more once lifecycle coverage and cleanup are applied consistently.
For each action, the tradeoff calculus differs:
- Lifecycle expiration is safe once tested, but a misconfigured filter can catch objects you meant to keep.
- Intelligent‑Tiering carries a small monitoring fee per object, so it’s less economical for buckets full of tiny files under 128 KB.
- CloudFront adds a distribution to manage and a cache invalidation workflow to maintain.
- Cross-region replication reviews often reveal replication rules left running long after the disaster-recovery project that justified them ended.
At scale, the real enemy isn’t any single wrong decision. It’s policy drift, where lifecycle rules get written once for the buckets that existed at the time and never get extended to new prefixes, new accounts, or new applications spun up six months later. Tagging every bucket by owner and retention requirement, then enforcing lifecycle coverage through infrastructure-as-code rather than manual console clicks, is how you keep this from creeping back.
S3 Intelligent‑Tiering: When It’s the Right Default
Intelligent‑Tiering solves a specific problem: you don’t always know how often an object will be accessed, and guessing wrong is expensive either way. Guess Standard when the data goes cold, and you overpay for months. Guess Glacier when the data stays hot, and you pay retrieval fees every time someone needs it.

Here’s how it actually works. AWS monitors access on each object automatically. If an object hasn’t been accessed for 30 days, it moves to the Infrequent Access tier. After 90 days with no access, it can move into Archive Instant Access. If you opt in to the additional archive tiers, objects can move further into Archive Access (comparable to Glacier Flexible Retrieval) after 90 to 730 days of configurable inactivity, and Deep Archive Access after longer stretches, all without you writing a single lifecycle rule for the transition logic itself.
The appeal is real: no prediction burden, no retrieval fees within the class when access patterns shift, and AWS explicitly recommends it as the default choice for workloads with unknown or changing access patterns. The catch is the monitoring fee, charged per object per month, which makes it a poor fit for buckets holding millions of very small files. Objects under 128 KB also aren’t eligible for automatic tiering in the first place, since they stay in the frequent-access tier by default regardless of how old they get.
- Use prefix or tag-based scoping to apply Intelligent‑Tiering only to buckets or paths where access patterns genuinely vary.
- Pilot the optional Archive Access and Deep Archive Access tiers on a small subset before enabling them account-wide. They add real savings for truly cold data but also add the longest retrieval delays.
- Estimate your monitoring fee exposure by object count before rolling this out broadly. A bucket with 50 million tiny files will accumulate monitoring charges that can rival the storage savings.
Pro Tip: Run Intelligent‑Tiering side by side with a manual lifecycle policy on a comparable bucket for 60 days if you’re unsure which approach wins for your workload. The bill difference will tell you more than any calculator.
| Factor | Intelligent‑Tiering | Manual lifecycle to Standard‑IA/Glacier |
|---|---|---|
| Storage savings vs. retrieval fees | Automatic, no in-class retrieval fees | Requires accurate prediction; wrong guess triggers retrieval fees |
| Access latency | Matches whichever tier the object currently sits in | Fixed by whichever class you chose |
| Minimum storage duration | None for standard tiers | 30 to 180 days depending on class |
| Per-object overhead | Small monitoring fee, no Glacier metadata unless archive tiers enabled | Glacier metadata overhead if transitioned |
| Monitoring/automation fees | Per-object monthly charge | None |
Copy-Ready Lifecycle Rules and CLI Commands
Configuring these rules takes minutes once you know the shape of the JSON. Here are the four patterns that cover most accounts.
Abort incomplete multipart uploads after 7 days (the baseline AWS recommends):
{
  "Rules": [
    {
      "ID": "AbortIncompleteMultipartUploads",
      "Status": "Enabled",
      "Filter": {},
      "AbortIncompleteMultipartUpload": {
        "DaysAfterInitiation": 7
      }
    }
  ]
}
Expire temporary logs after 30 days:
{
  "Rules": [
    {
      "ID": "ExpireLogsAfter30Days",
      "Status": "Enabled",
      "Filter": { "Prefix": "logs/" },
      "Expiration": { "Days": 30 }
    }
  ]
}
Expire noncurrent versions after a set retention window:
{
  "Rules": [
    {
      "ID": "ExpireNoncurrentVersions",
      "Status": "Enabled",
      "Filter": {},
      "NoncurrentVersionExpiration": { "NoncurrentDays": 90 }
    }
  ]
}
Transition cold data to Glacier while respecting minimum durations:
{
  "Rules": [
    {
      "ID": "TransitionColdDataToGlacier",
      "Status": "Enabled",
      "Filter": { "Prefix": "archive/" },
      "Transitions": [
        {
          "Days": 90,
          "StorageClass": "GLACIER"
        }
      ]
    }
  ]
}
Apply any of these with the AWS CLI:
- Save the JSON as
lifecycle.json. - Run
aws s3api put-bucket-lifecycle-configuration --bucket YOUR-BUCKET --lifecycle-configuration file://lifecycle.json. - Confirm with
aws s3api get-bucket-lifecycle-configuration --bucket YOUR-BUCKET. - Before applying the multipart cleanup rule anywhere, check what’s actually sitting there:
aws s3api list-multipart-uploads --bucket YOUR-BUCKET, then clean up manually withaws s3api abort-multipart-upload --bucket YOUR-BUCKET --key KEY --upload-id IDif you want to verify before automating.
Pro Tip: Run list-multipart-uploads on your five largest buckets right now, before you configure anything. It takes thirty seconds and often reveals thousands of abandoned uploads that have been silently billing you for months.
Practitioners who’ve run this rollout pattern across dozens of accounts consistently report the same lesson: the biggest early wins come from cleanup, not clever architecture. A 7-day multipart abort rule and a 90-day noncurrent version expiration, applied consistently across every bucket, often outperform a more sophisticated tiering strategy applied to just a few.
Test any transition or expiration rule on a single bucket or prefix for 30 to 90 days before rolling it out account-wide. Watch Storage Lens during the pilot window to confirm objects are actually transitioning on schedule and that no unexpected retrieval or early-delete charges show up.
Why Automated Transitions Sometimes Increase Your Bill
Here’s the counterintuitive part of s3 cost optimization: automating storage-class transitions without first checking access patterns can make your bill worse, not better.
The mechanism is straightforward. Every Glacier-family class carries a minimum storage duration, ranging from 90 days for Glacier Flexible Retrieval to 180 days for Deep Archive. Delete or transition an object before that window closes, and you’re charged an early-delete penalty equivalent to the remaining minimum duration. Add retrieval fees on top, and a well-intentioned “move everything older than 30 days to Glacier” rule can cost more than leaving the data in Standard, especially for data that turns out to get accessed more often than assumed.
Per-object overhead compounds the problem. Glacier and Deep Archive both add roughly 32 KB to 40 KB of metadata overhead per object, billed at the class’s storage rate, according to AWS’s cost optimization guidance. For an account with a few thousand large objects, this is trivial. For an account with tens of millions of small files, it can add up to a meaningful line item on its own.
AWS’s own storage guidance is explicit on the fix: analyze access patterns first, using Storage Class Analysis or Storage Lens reports, before automating any wide-scale transition. Blind rules based on age alone, without confirming that access frequency has actually dropped, are the single most common cause of transition-related cost surprises.
- Avoid transitioning objects under 128 KB into IA or Glacier tiers; the minimum billable size and per-object overhead routinely erase the storage savings for small files.
- Run a 30 to 90-day access audit on any bucket before applying an aggressive transition schedule to it.
- Model transition request fees explicitly for buckets with object counts in the millions. Transition requests are billed per object, and that cost scales independently of file size.
Pro Tip: Set a CloudWatch billing alert or Cost Explorer anomaly alert before you pilot any new transition rule. If retrieval charges spike unexpectedly in the first two weeks, you’ll catch it before it becomes a quarterly surprise instead of after.
Rolling It Out: Audit, Pilot, Automate
Turning the actions above into a real program follows a predictable sequence, and the timeline scales with account size rather than complexity.
- Week 1: Enable Storage Lens at the account or org level, and tag every bucket with an owner and a retention classification.
- Weeks 1 to 4: Run the diagnostic. Let Storage Lens and CloudTrail object-level logging accumulate enough data to reveal real access patterns, not guesses.
- Weeks 2 to 4: Pick pilot buckets. Choose two or three buckets that scored high on the priority checklist from earlier in this guide.
- Weeks 4 to 8: Apply lifecycle rules or Intelligent‑Tiering in the pilot buckets only. Monitor retrieval and transition charges daily during this window using Cost Explorer.
- Weeks 8 to 12: Evaluate and scale. If the pilot buckets show the expected savings with no retrieval-fee surprises, extend the same rules to the rest of the account, grouped by owner tag or workload type.
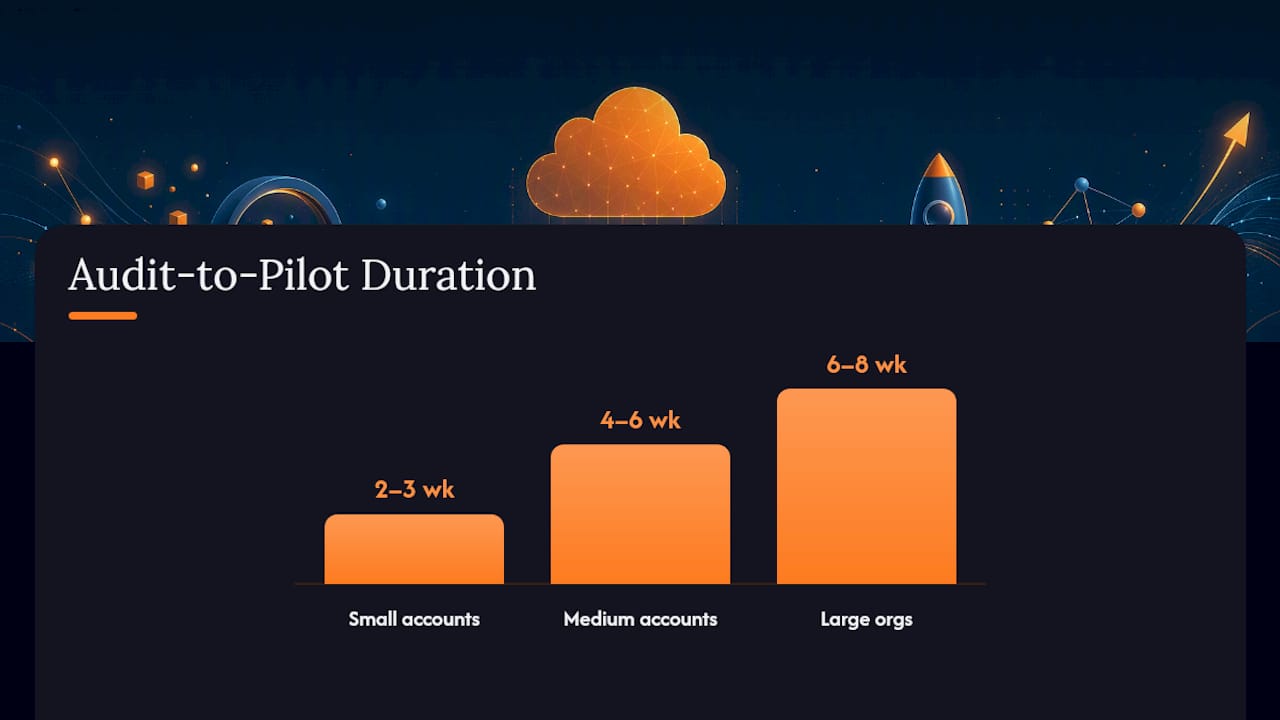
Timeline expectations differ by account size:
- Small accounts (under 50 buckets) can usually complete audit through pilot in two to three weeks and see visible savings by month one.
- Medium accounts (50 to 500 buckets across a handful of teams) typically need four to six weeks for the diagnostic and pilot phase, with full rollout by the end of the first quarter.
- Large, multi-account organizations should expect the audit and pilot phase alone to take six to eight weeks, with staged rollout continuing across two to three quarters as new teams and prefixes get folded in.
Governance is what keeps the savings from eroding. Schedule a quarterly lifecycle audit using Storage Lens, set CloudWatch or Cost Explorer alerts for buckets that fall out of lifecycle coverage, and enforce policy through infrastructure-as-code guardrails rather than relying on someone remembering to tag the next bucket correctly. Policy drift is the quiet failure mode: rules written once for today’s buckets, silently absent from tomorrow’s.
| Milestone | Timeframe | Expected outcome |
|---|---|---|
| Storage Lens enabled, buckets tagged | Week 1 | Full visibility into cost drivers |
| Pilot buckets selected and rules applied | Weeks 2 to 8 | Confirmed savings pattern with no fee surprises |
| Account-wide rollout | Month 3 (small/medium) to Quarter 3 (large orgs) | Sustained double-digit savings across most buckets |
| Quarterly governance review | Ongoing | Lifecycle coverage stays current as new buckets appear |
Where Continuous Optimization Beats a One-Time Cleanup
Most teams treat S3 cost optimization as a project with an end date. Run the audit, apply the lifecycle rules, declare victory, move on. That works for exactly one billing cycle.
The problem is that AWS accounts are not static. New buckets get created by new services. New engineers spin up prefixes that never inherit the lifecycle policy someone wrote eighteen months ago. A pilot that succeeded on three buckets quietly fails to extend to the three hundred buckets created after it. This is the policy drift pattern that shows up in almost every account that skips ongoing governance, and it’s the reason a one-time cleanup produces a temporary savings bump that erodes back over two or three quarters.
Continuous monitoring closes that gap. It means Storage Lens metrics get checked on a schedule, not just during a quarterly fire drill. It means anomaly detection flags a bucket the moment its retrieval charges spike, instead of someone noticing three months later on an invoice. It means lifecycle policy coverage gets enforced across every new account and prefix automatically, not manually re-audited by whoever remembers to do it.
This is where the gap between self-service and managed FinOps tends to show up most clearly. A single cloud administrator running Storage Lens once a quarter can catch the obvious wins. Catching drift across dozens of accounts, dozens of teams, and constantly changing workloads is a different scale of problem, one that benefits from automated remediation and cross-account enforcement running continuously rather than reactively. Teams that adopt a managed FinOps layer for this typically see the initial savings curve hold instead of decay, because someone (or something) is watching every account, every week, not just during the next scheduled audit.
How Everythingcloud Keeps S3 Costs From Creeping Back
The playbook above gets most accounts most of the way there, but keeping it there is a different job than setting it up once. That’s the gap Everythingcloud is built to close: continuous monitoring across every AWS account you run, automated remediation of the exact drift patterns (missing lifecycle rules, abandoned multipart uploads, orphaned noncurrent versions) that quietly rebuild your bill after a successful cleanup.
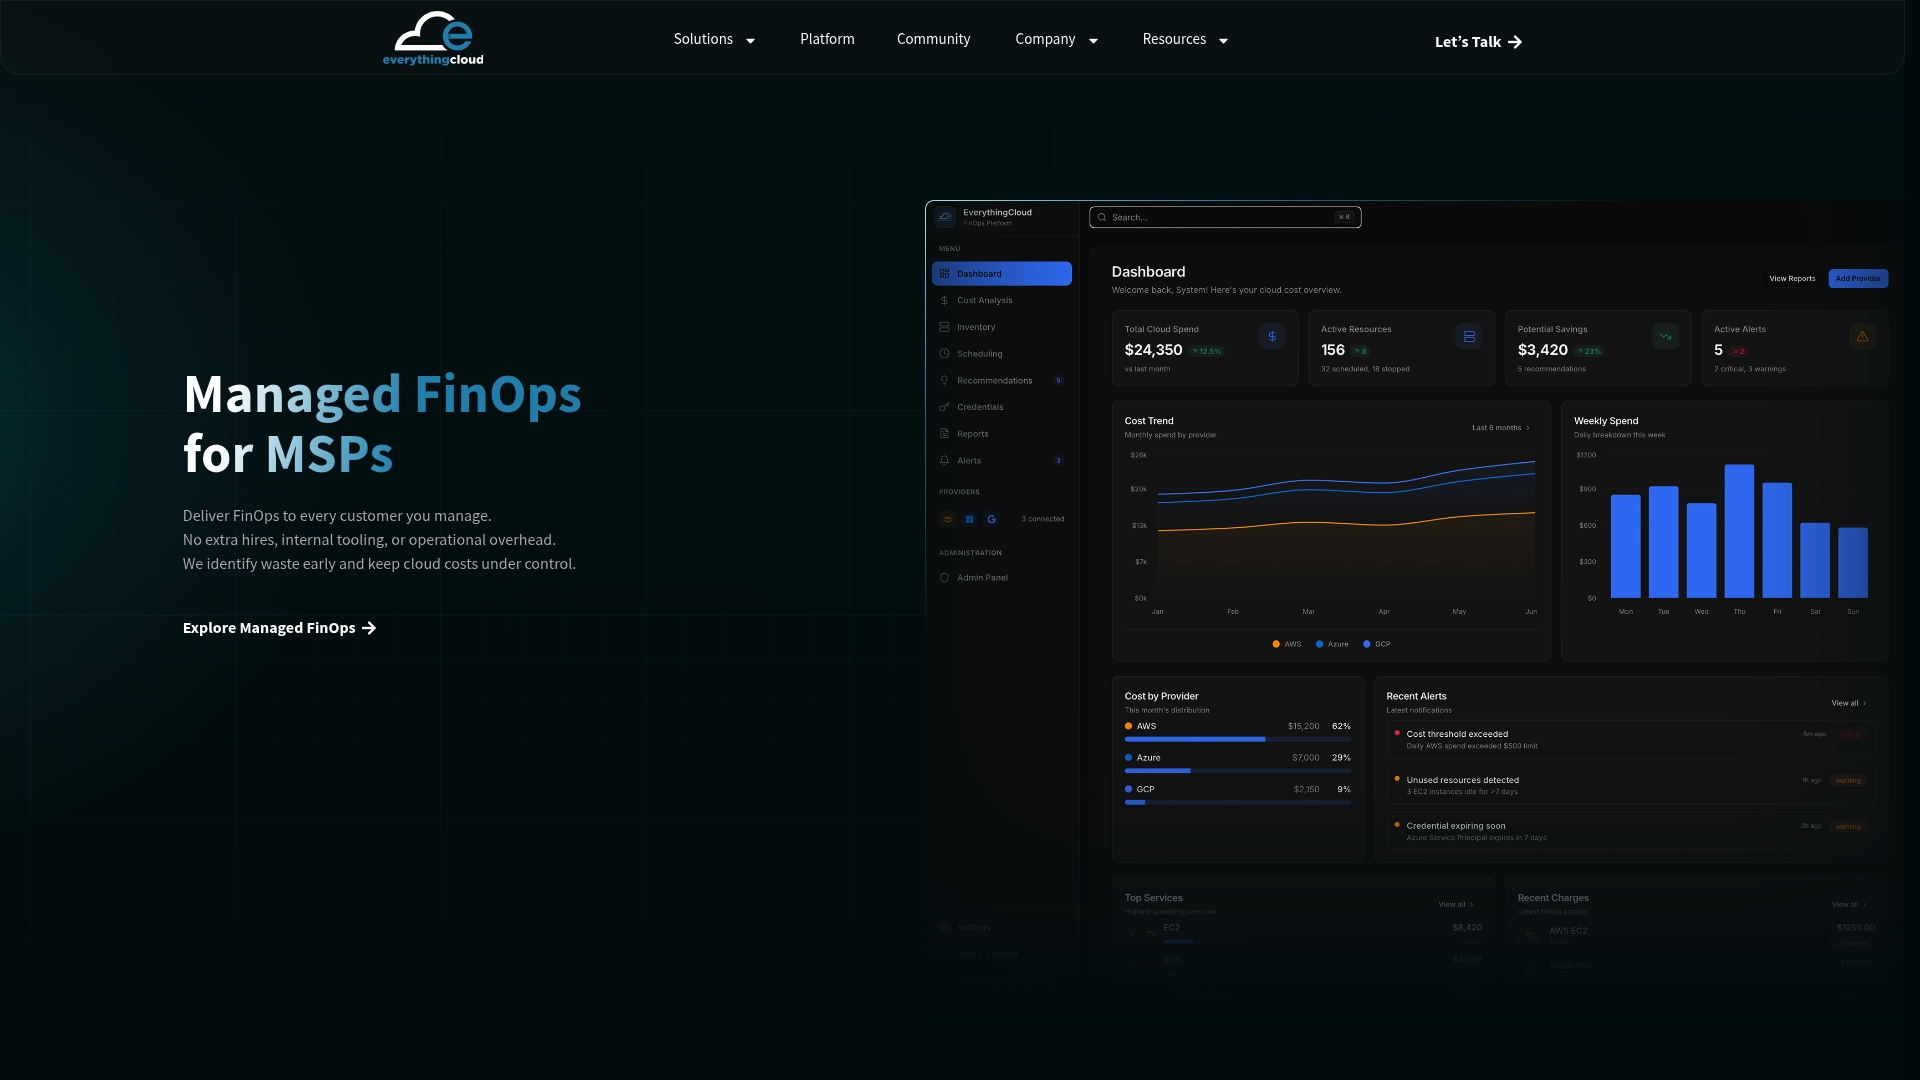
For MSPs and internal cloud teams managing dozens or hundreds of accounts, Everythingcloud’s platform layers anomaly detection and multi-account enforcement on top of the same signals Storage Lens surfaces, then applies expert FinOps review on top of the automation so remediations happen without waiting for the next quarterly audit. If you’re already stretched thin running the audit-pilot-automate cycle manually across a growing account footprint, a managed FinOps approach converts that recurring project into something monitored around the clock instead of revisited every few months.
The next step is straightforward: request an assessment of your current S3 and broader cloud spend, see where drift has already crept back in, and decide whether continuous, automated governance is worth handing off. Start with a contact request to walk through what that looks like for your account structure.
Sources
The technical details above draw directly on AWS’s own documentation and published guidance, and the same sources are worth bookmarking for anyone implementing these rules directly.
- Discovering and deleting incomplete multipart uploads to lower Amazon S3 costs
- Using Amazon S3 Storage Lens to optimize your storage costs
AWS’s own guidance is consistent across every one of these sources: the highest-ROI S3 savings come from cleanup and visibility, not clever architecture. Storage Lens tells you where to look. Lifecycle rules and multipart cleanup do the actual work.